Monday, July 17, 2017

my experience with microneedling

I feel that you guys have been a part of this skin journey for years now. Several years ago, I shared how the Paula's choice system really helped with my acne - that system was the beginning of getting my skin to where it is today. Then about two years ago, I added a tretionoin gel to the regime, which did a great job with helping with the hyperpigmentation scars, as well as with keeping my acne at bay.

Last November, I was seeing my dermatologist for my last tattoo laser removal session. It was right after CR and I got engaged, so I asked her if she had any suggestions for getting my skin to be as great as it could be before our wedding. We discussed lasers (like Fraxels) versus peels versus microneedling. In the end, she recommended microneedling for me as I'm still young, and my main concern at that point was the scarring left over from the acne, and some of the spots that were starting to pop up on my face.

You may have heard of microneedling, as it's one of the big up and coming cosmetic treatments in the dermatology world. Microneedling is the process of using tiny needles to cause microscopic injury to the skin, also called "collagen induction therapy". This stimulates your body to respond to this injury by increasing the production of collagen, which helps treat texture, color, and unevenness in the skin. There are two ways about getting this type of treatment. There's the kind that you can do at home - from what I've read, this is a nice way to get into microneedling, but the needles don't penetrate as deeply or as evenly, so you aren't going to see the same results as you would if you had it done professionally. Then there's the kind where you see someone in a dermatologist's office. At my derm's office, there is an RN who does all of her microneedling and peels. They use the Rejuvapen, which looks like... a pen with a bunch of tiny needles on it.

Okay, so before I get into the process of microneedling, here are some before pictures.
It's hard to really see the scarring in these pictures - I really tried to get better pictures, but depth is hard to capture in pictures. I had true pockmark scars, especially along my temple and the lateral sides of my cheekbones (probably because I get acne where I rest my face on my hands, a habit I can't seem to break - it's all that studying!). But you can see that some of the hyperpigmentation from the acne was still present, and I had a bunch of new discoloration showing up. Once I saw these pictures, I realized even though I don't really see much sunlight anymore, it really was time to wear sunscreen daily, so I'm proud to say I've been wearing this sunscreen daily for over six months now, and feel better every day knowing I'm taking better care of my skin, and preventing more of those age spots from showing up.

Okay, so about the actual process of microneedling! At my dermatologist's office, they started the process by taking before pictures, and then going to their back procedure room. There, the nurse applied topical lidocaine to my face to numb it. I basically then took a 15 minute nap while I waited for the cream to start working. 
mascara details: urban decay primer followed by bobbi brown's mascara
Then, the nurse used the Rejuven and started working at on my forehead down. Because of the lidocaine cream, I felt very little besides just the vibrating. I would say there really was very minimal pain involved, even when she went closer to the edges of my face, where there wasn't always lidocaine cream. You can see how she did it below: 


The only true painful part was the "stamping", which from how she explained it, is she "stamped" aka went deeper, on the scars that needed a bit more collagen induction. It was a split second of pain for each stamp, and nothing that should scare you away from the process, but I definitely want to warn you that that may be painful for a split second.

All in all, the process from start to finish takes about one hour.

After the whole face has been done, you are ready to go! Your face will be red and feel tight - kind of like if you got a bad sunburn. Here's what I looked like right after walking out of the office (you can even still see the lines the scrub cap left).
For the next 12 hours, my skin felt pretty tight. Nothing unbearable, but enough that I noticed it. By the next morning, there was just a bit of redness remaining, and within 24 hours, my skin color was back to normal. During the first few days, you are not supposed to sweat or go into the sun much.

Here is the downside to microneedling. It is not a quick fix like a facial would be. You do not walk out of the dermatologist's office with brand new skin. It takes about 4-6 weeks to really see a difference, and for optimal results, you have to have multiple sessions. So I have had three sessions, spaced between December and May. Each session at my dermatologist's office cost $200. As someone who has been unhappy with my skin for the last 15 years, that money was more than worth it to get rid of the evidence of the acne that my skin is slowly overcoming. I now only wear a primer and a BB cream daily, and some days only a bit of concealer under my eyes because I don't need to put a bunch of stuff on my face anymore. I plan on getting one more treatment next spring, about two months before our wedding.


Overall, I am extremely pleased with the results that microneedling gave me. If you have acne scarring or hyperpigmentation that just won't go away, talk to your dermatologist to see if microneedling may be a good option for you. I firmly believe that creams and lotions can only do so much, sometimes you have to get the professionals involved!

disclosure: I am obviously sharing this from the point of view of a patient, this is not medical advice! :)

Friday, June 16, 2017

love for elemis 24/7 super skin system

I am working with QVC to review some of the products they sell. I am receiving compensation to review these products, but all the opinions are always my own. I'm excited to share these amazing skin care products with you!

One of my favorite parts about blogging has been that I get to try new products quite often - as I continue to try to perfect my daily skin care routine, it has been such a treat to try skincare products from brands new to me. One of those lately has been Elemis!

Elemis is a British brand that is now sold on QVC that is science led and results driven. QVC sells a bunch of their products currently, from toners to enzyme peels to face oils. I got to try out their three piece collection plus their rose scrub, and honestly, I can't pick a favorite because they are all amazing in their own way.

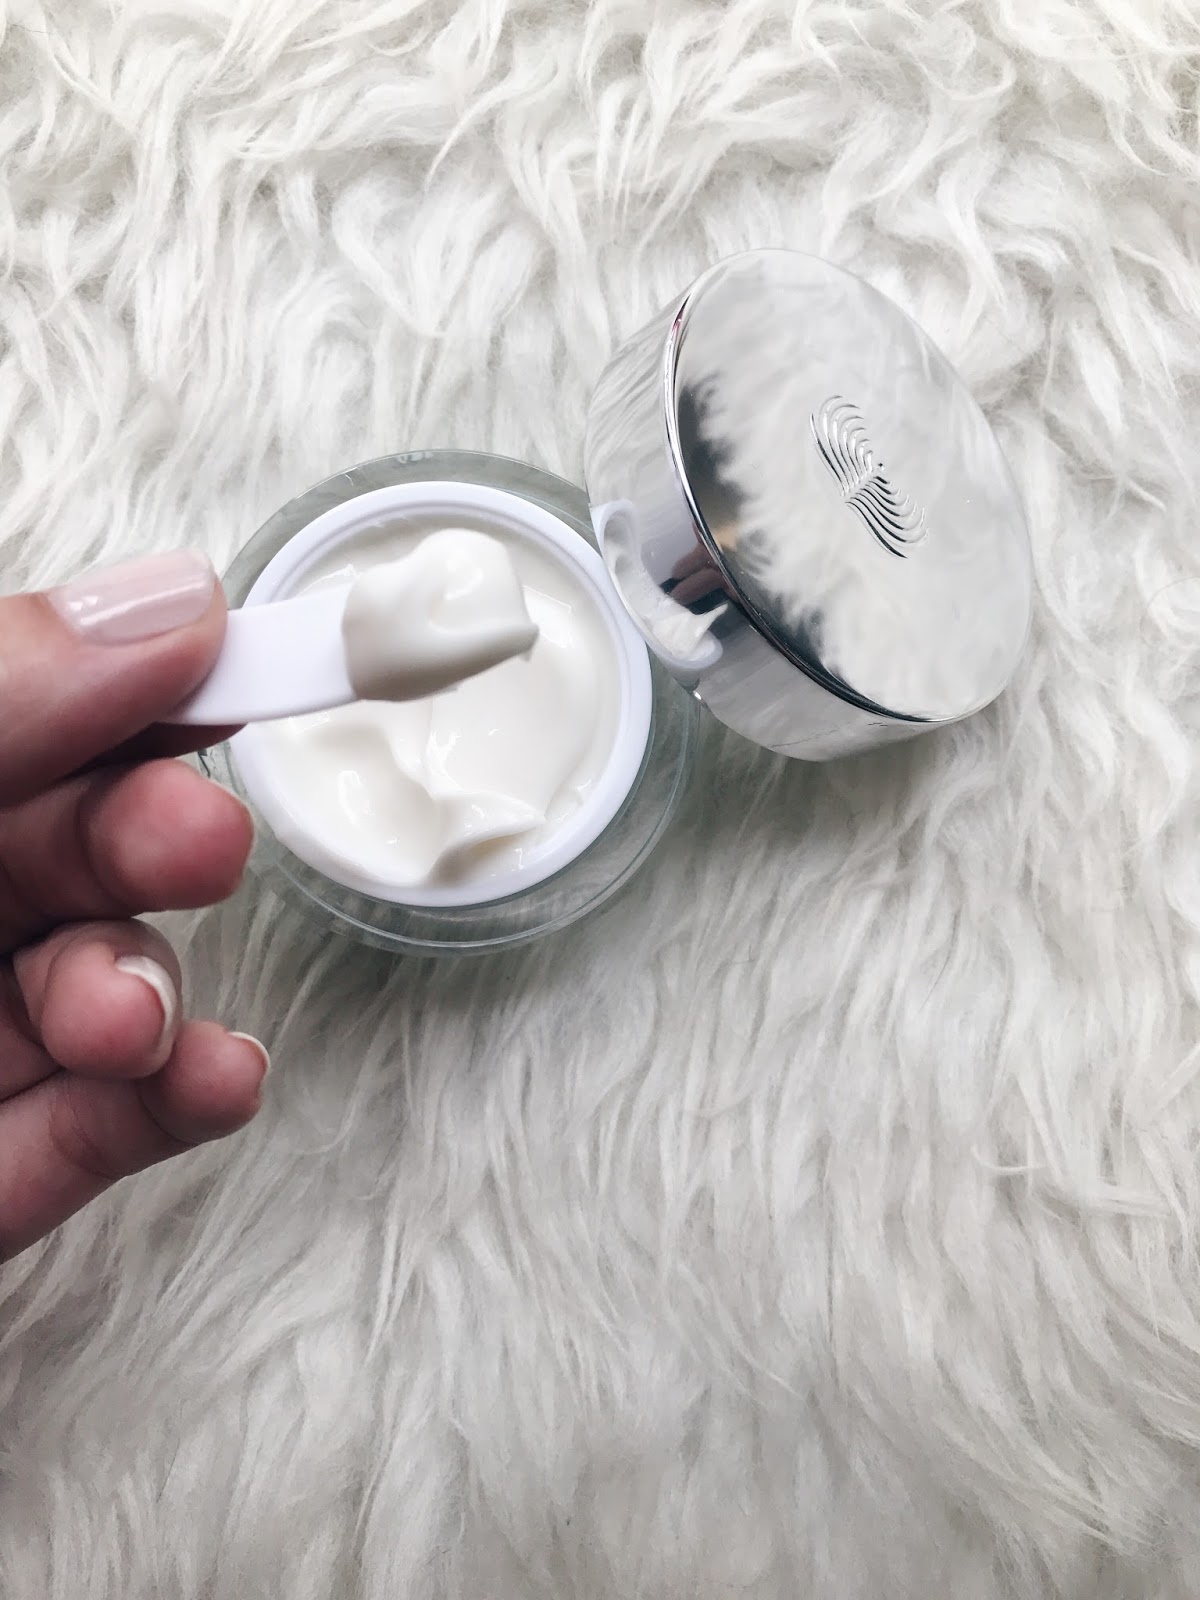
ELEMIS Pro-Collagen Cleansing Balm
I was initially the most excited about the cleansing balm because I am always on the look out for a new way to remove my makeup. The Elemis cleansing balm has a very clean smell to it. I take about a dime sized amount out of the jar, rub it between my fingers to liquify it slightly, and then rub it all over my eyes and face to remove my make-up. After rinsing with water, all of my make-up is gone, and it doesn't leave a residue like I've found with other balms I've used in the past. I took this with me to Ireland, and used it the whole time I was there - the container is perfect for traveling because nothing can spill out of it or leak. 
 ELEMIS Pro-Collagen Marine Cream
The other two items in the set are the Night Recovery cream-oil, and the Pro-Collagen day cream. I love that it's very clear about when to use each product and that they are formulated for either moisturizing under your make-up, or for your skin recovering overnight. Over the years, I've really found that you just need different products depending on what time of the day it is. The night recovery cream-oil combo is a new one for me - it looks like a cream, but has the highly moisturizing effects of an oil. You know I'm currently all about the face oils, so I love how moisturized my skin feels after using this. I use this on the nights I don't use my prescription retinoid. 
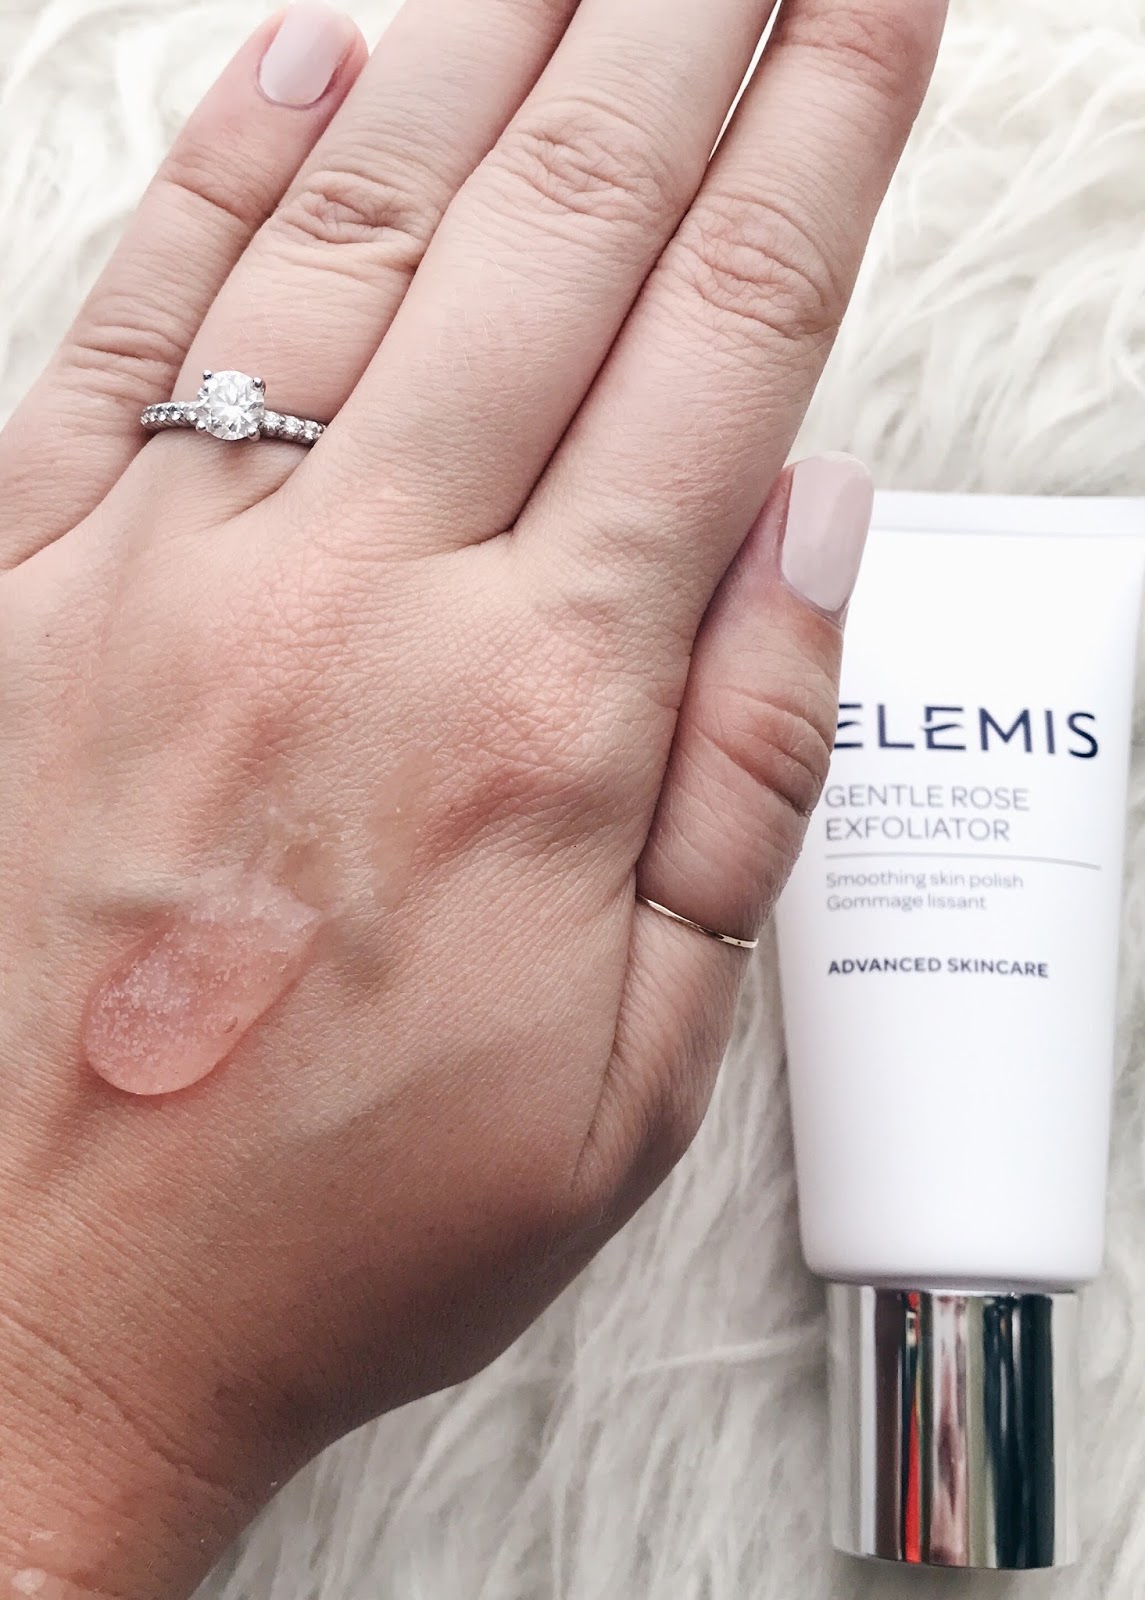
 Elemis Gentle Rose Exfoliator
Not included in the three part set, but one I wanted to mention, is the Elemis Gentle Rose Exfoliator. As someone with dry and flaky skin, I am constantly looking for something to help with making my skin look fresh and not dull. If you love the smell of roses as much as I do (my grandma has a huge rose garden and the smell of roses always reminds me of her), you will love this scrub. It's definitely on the gentle side, so I use it about every third day. It removes all of those flaky spots without rubbing your face raw, which is something I've experienced with harsher scrubs in the past. I usually follow with a face mask and then the recovery oil. My skin glows the next morning ðŸ‘Œ

QVC is currently selling the 3 part set for $99 (if purchased each item separately, it would be over $250!). Below are a few more Elemis items being sold on QVC. I have my eye on the bliss capsules - they are basically little capsules with concentrated oil, which I think is just so clever. 


Tuesday, May 2, 2017

hair products I'm currently loving

I've been trying out a few new hair products recently, so I wanted to discuss them all in one place! 

First up is L'oreal's Ever Pure shampoo in the Frizz Defy version. I've been using the Ever Pure line for years - I think it's one of the reasons my hair has been doing so well the last few years. This line of shampoo is sulfate free, and for around $8, always a really good deal. My bottle also says it's 100% vegan, if that's something you're interested in (it wasn't something I was looking for in a shampoo as I'm not vegan, but I did think that was interesting!). Anyway, I've tried a bunch of different Ever Pure shampoos, usually sticking with the version for colored hair. I picked up this Frizz Defy shampoo + conditioner the other day, and my hair has never been so soft while in the shower ever. It was actually the inspiration for this post because I was like "I have to share this!!!". So if you're looking for an inexpensive shampoo from the drugstore, I would highly recommend the Ever Pure line, especially this Frizz Defy Shampoo!
I've been using Kiehl's smoothing heat protector for years and years now, but was tempted to try out DryBar's Hot Toddy recently. This is mainly a heat protector - it promises to protect up to 450 degrees F, and also to repair split ends. I will say, this smells amazing - I think my hair always smells so good after using it! I find that a lot of spray heat protectors leave hair stiff and not very touchable, so I've always preferred a cream version. That being said, I don't think I've noticed a ton of difference between this and the Kiehl's version. Both say they protect your hair (but how do you know if it really does? No idea, I just have to believe it works!), both make your hair smooth, and make it more manageable. Since the Kiehl's cream is $17 for 5 ounces, versus $30 for 3.4 ounces of the Hot Toddy, I'm going to go back to the Kiehl's cream once this is done. It's not because I think the Hot Toddy isn't doing a good job, I just know I get the same results for less money.
 bumble and bumble thickening cream review
I have these little short hairs along my right hairline that I've never managed to completely grow out (if you look at these pictures, you can see what I mean). No matter how much deep conditioner and minimal heat I apply to it, the hair just doesn't really stop breaking off there. I've used various methods to try to tame them (as they are frizzier and stick off my head) over the years. I recently tried Bumble and Bumble's contour cream while playing with hair products at Sephora, and it did such a great job of making the hairs lay flat without making them stiff or sticky. You really only need a tiny amount, especially if you have fine hair like I do, so I'd imagine that this jar would last for years and years. I think it's originally meant for shorter hair styles, but it has been doing a great job for me taming my baby hairs! If you also struggle with those short hairs along your hairline, this could be a good option to help tame them!
The last item I wanted to mention is Aveda's Shampure dry conditioner. I had never heard of a dry conditioner before, but I was excited to receive this from Aveda as I'm a huge fan of their dry shampoo. I would say this is similar to a detangling spray, except that you use it on dry hair rather than before blow drying wet hair. I've been using this on day three and four of my ~ 5 day hair process, as my hair tends to get a bit tangled from all the teasing and quick buns I do. As with all Aveda hair products, it has a slight floral/herbal smell, which I really enjoy, but I know some people are quite sensitive to smells, so I wanted to mention it just in case! This would be a great option for those of you, like me, trying to constantly push how many days you can go before you need to wash your hair again (mostly while figuring out your social calendar! 😂).

Alright, that's it for today! I have my eye on a couple of products in the future - t3 has some gorgeous curlers that I'd love to try on my hair since I love my curling iron from t3 so much (see Veronika's review here), Aveda's moisturizing hair mask, and eventually I'd really like to upgrade my current hair dryer (anyone have one they just love?) .

Tuesday, April 18, 2017

my daily make-up routine (& a Sephora giveaway!)

It's been a hot second since I last wrote about my daily make-up routine (...so it's been like 18 months), and since quite a bit has changed (and a few things have stayed the same), today's post is all about my current make-up routine! I have this thing down to a science, and can do all of this in about ten minutes now. If I'm in a hurry, I skip the foundation and highlighter parts, but for the most part, here's what I use every day!
  1. Smashbox primer: I have larger pores, and this does a great job of "blurring" them out. Downside is that some days I need more hydration, so I sometimes use the Laura Mercier primer for those dryer days. 
  2. Hourglass foundation stick: A YouTube favorite, I started using this about four months ago and absolutely love it! I love that it's really buildable (I don't it to be super thick, so I just use a few swipes of this), that you don't have to get any foundation on your hands, and that there is such a broad selection of colors so you can really get your perfect color. I blend it out with my Beauty Blender. Highly recommend, especially if you travel a lot (no risk of spills!).
  3. Urban Decay concealer: Still one of my favorite concealers I've ever used ( I'm on my third tube now). I am curious about the Tarte Shape Tape though - everyone seems to love it!
  4. Smashbox powder: Still one of my holy grail items. I've been using this for over six years now and have no plans on changing my powder anytime soon. I use it with an It Cosmetics brush and the combo is ðŸ‘Œ
  5. Charlotte Tilbury bronzer: One of the newer pieces of my routine, I love the color and formulation of this bronzer. It's not too orange, and has good staying power without being overwhelming. This guy is a bit of a splurge for sure. I use it with this Morphe brush (which I absolutely adore!).
  6. Bobbi Brown blush: I wear the "pretty pink" color and it's the perfect amount of pink glow for every day wear. I apply it with a Sephora blush brush that I've had for years and years. 
  7. Urban Decay setting spray: As I mentioned last week, I spray this on a beauty blender, and then tap on to my skin. Have you tried this trick yet? It's one of my favorites!
  8. Becca highlighter: This is something I've owned for over a year, and continue to really enjoy. I use an Anastasia brush to apply a little on my cheek bone and nose. While I love the pretty glow this provides, it's also the first step I'll skip if I'm in a hurry. 
  9. Charlotte Tilbury eyeshadow: In every day life, I just use my fingers to put a swipe of the lightest color on my lid. It brightens up my deep set eyes, and I think it provides a better foundation for my eyeliner. If I'm going somewhere special, I'll apply a bit of the darker color to my crease for added definition.
  10. Stila eyeliner: You already know this was going to be here - it's the only eyeliner I've used consistently for the past seven years or so. #holygrail
  11. Eyelash curler: One of those steps that makes such a huge difference that I never ever skip it! Eyelash curlers are the secret to longer looking fluttery lashes. 
  12. Eyebrow pencil + eyebrow gel: I have used several different methods for "applying your brows" but I really like using the brow definer pencil the most - when you apply and then use the spooley to brush it out, I think it looks a lot more natural than a pomade like the dipbrow, and it's a lot quicker to use than a powder. Combined with a clear gel, they now last all day!
  13. Eyelash primer + mascara: Saving the best (and most important!) step for last! I have been using this eyelash primer for about 18 months now, and am on my third or fourth tube of it. It makes such a difference in the thickness and volume of your eyelashes, and really makes your mascara stay put (I never have issues with flaking). I've been playing around with a few new mascaras, but my go-to is still the eye opening mascara. It does dry up quicker than others I've used, but a few drops of contact solution fixes that problem real quick, and extends the use of the tube for at least another month this way!
And that's it! It takes so much longer to write that up than to actually do it ðŸ˜‚  I did want to mention that this upcoming week is the spring VIB sale event! Here are the details:

  • VIB Rouge: 
    • April 18th - April 24th
    • 15% off with code ROUGESPRING
  • VIB:
    • April 19th - April 24th
    • 15% off with code VIBSPRING
  • Beauty Insider:
    • April 20th - April 23rd
    • 10% off with code BISPRING

Since I'm doing pretty good on my go-to products (I have a few favorites stock piled from previous sales), there are just a few things I'm going to order. I want to try  Hourglass's primer (I've read so many good things!), this CC cream from It Cosmetics, and Dior's lip scrub+ balm combo (I tried this last weekend and my lips looked amazing after!). To celebrate my five year of blogging anniversary though, I want to give one of you a little extra spending money for the sale! Enter the giveaway below - and as always, thank you for being my internet friends and loving make-up and skincare as much as I do! Giftcard will be in US dollars.

Tuesday, April 11, 2017

beauty tuesday: first impressions and new favorites

I have been playing with a bunch of new products over the last few months. Some I found by falling into an internet black hole, some I tried samples and loved, some were sent to me, and others were suggested by friends. I didn't think any really warranted a full review post (although a couple will have follow up posts with continued use), so I wanted to do a quick first impressions and mini review of the products!

Banila Clean it Zero Cleanser: K Beauty and its 10 step nightly routine has been a big thing discussed online for a while now, and every time I read about some people's routines, I get really confused about all the different steps, and what each of them does and then I just give up and continue my standard make-up removal, cleanser, treatment, moisturizing routine I've been doing my whole life. But then I recently read Sydney's post about her new routine, and man, her skin does look pretty amazing, and since her post made it a little easier to figure out how to go about all of this stuff, I purchased a few things. The first one is this balm cleanser, the first step in "double cleansing". For those of you who use coconut oil to remove your make-up, this is pretty similar, except it cleanses more and doesn't leave as oily of a residue behind. You scoop a little of the solid balm into your fingers, rub all over your face and eyes, and then cleanse with warm water. It does a great job of removing all of my eye make-up! I then cleanse again with my go-to Paula's Choice cleanser to remove all remaining make-up and cleansing balm. My face feels so soft after, and I like that I don't have to wipe at my face with any clothes or wipes or pads.

Neogen Wine Exfoliating Pads: You guys know I'm all about exfoliating - when you have dry flaky skin, anything that helps your skin look bright and not dying wins in my book. I've seen these wine soaked pads mentioned a few times over the past few months, so I figured it was time to try. I use these 2-3 times a week after double cleansing. Basically they smell like a combination of red wine and grape jelly - if you're sensitive to smells, you will probably hate this. I love it, I think it smells amazing! These are little gauze pouches, basically - you stick your finger in them, use the "rougher" side first (it's not rough at all) and then use the softer side after, to rub all over your face to exfoliate. My belief in this kind of over the counter skin care product is that it won't really change what your skin is really like - chances are, your pores won't be that much smaller, your acne isn't going to magically all disappear, your dark spots aren't going to just go away. But what it does in the day to day feeling of your skin is real - it does change how my skin feels, and how other skincare products react with my skin. So I would say in this situation, my skin does feel smoother! But it's not a magic product, just like most skincare products aren't. If you want a nice smelling exfoliator that helps with flakiness, this is a great product to try!

The Ordinary oils: In Sydney's post, a commenter said that there's no need to pay $40 for some of the face oils because you can get them for a quarter of that price from The Ordinary. I had never heard of this brand, so I fell deep into the internet hole about this brand. Basically, The Ordinary provides the active ingredients without any of the fillers...and for fair prices. I don't know if it's because we are so conditioned to see $100 bottles of face oil or if it's because we believe you can't buy good products for inexpensive prices, but I was pretty shocked when I saw that you could get the same 100% Squalane that sells for $60 from some brands for EIGHT DOLLARS from The Ordinary. $8! So at those prices, what do you really have to lose? Here's my disclaimer: I do not own the expensive bottle of Squalane, so I can't compare the two, but this little $8 bottle of oil feels pretty amazing. At night, after cleansing and exfoliating, I pat the squalane and rose hip see oil on my face. My face glows - I seriously can't stop looking at it because it looks so bright and clean and glowy! Again, I think this is one of those products that can change your skin when you apply it, but I have no idea how much it changes your skin over the long run, if that makes sense. The only product I have ever used where I noticed my skin actually changing is my prescription tretionoin cream - that product is the holy grail of changing your skin. These products change my skin on the daily, and so if you are looking for a few inexpensive face oils to try, The Ordinary is a great place to start! I've been very impressed with the products in the few days I've used it so far.


Ole Henriksen Truth Serum: A few months ago I reviewed Ole Henriksen's Power Peel system. I felt it was pretty harsh on my skin, so I returned it. Then I received a sample pack for the Power Bright system, and while it wasn't as harsh, the only part I really liked was the serum, or the middle step. Turns out, you can buy just the serum part without buying the harsh scrubs! So I bought the smaller bottle, and have been using it for about three weeks now. I use this in the morning after washing and toning my face - I use half a squirt, and pat into my face, and then follow with moisturizer. If you have oily skin, this may not be the best option for you, but for those of us with dry skin, it feels so good. I would actually say my skin does look radiant after using this (and I don't say that about everything)! It contains Vitamin C, which is another one of those skin care ingredients that has actually been shown to improve wrinkles and improve texture of the skin. I bought this before finding The Ordinary, but if you want to try a different Vitamin C product and not spend $50 on this oil, they make a Vitamin C suspension for $6...

Chanel Le Volume Mascara: I went to a Nordstrom Beauty event about two months ago with Katy. One of the products we got to play with was Chanel's volume mascara. Katy said she swears by the sample sized tubes, and it's been the best mascara she's ever used. You guys know I'm an eyelash junkie - I'm all about long thick lashes! So even though I kind of hate plastic brushes, I gave the sample tube a try...and have been using it ever since! It just really lifts and separates your lashes, while also building up the volume. I use one coat of primer, two coats of this, and one coat of Bobbi Brown's mascara for added thickness (I know it seems excessive...I just really love dark and thick eyelashes). Katy did say that she really likes the sample tubes more than the full size product, and I have only used the sample sizes so I can't verify her statement, but believe her. If you live near a store that sells Chanel makeup (like Nordstrom), stop by a counter and ask for a sample tube! It costs nothing, and maybe it'll be your new favorite. A sample tube lasts 2-3 weeks!


Bumble and Bumble Hairspray: When I got my hair colored back last fall, the stylist used this hairspray on my hair, and my curls lasted for THREE DAYS. That's unheard of for me! I remembered that she used a blue Bumble and Bumble hairspray, so when I finished  my last bottle of hairspray (which, tbh, I'd had for like two years because I don't use hair spray every day), I bought a bottle of this. And you know, my curls really have lasted longer! I love the fine mist, I love that it's technically a light hold, and I love that it's a twist top rather than having a lid that will mostly likely go missing.

Vichy Double Peel Mask: I was sent this tub by Amazon to test out, which I will be honest, I was so excited about. My mom has been a lifelong Vichy skincare user - whenever we go to Germany, she buys like ten tubs of products to bring back with her to the US. I trust my mother implicitly, so whatever works well for her, I know will be a good product. I fell in love with this "double" peel face mask - it exfoliated mechanically with powdered volconic rock, and then chemically exfoliated with AHA. I use this about once a mask, and then follow with a face mask. I would say this is a pretty gentle peel/exfoliator - there is not redness or burning after use (I have pretty sensitive skin, so this is important!). Definitely gentle enough to use multiple times a week. Be on the look out for a chance to win a trio of Vichy masks in the near future!

Tuesday, April 4, 2017

all my beauty secrets, in one post

easy beauty tips

Okay, that title is misleading, because I have all of four beauty secrets. But I am going to share them today! These aren't those odd beauty tips like "use a potato instead of a beauty blender" or "use a spoon to apply eyeliner", but little things I've experimented with over the years that have really worked for me!

spray setting spray on a beauty blender instead of your face
urban decay setting spray with a beauty blender

I discovered using a setting spray about a year ago. I loved that a two second spritz could solidify your make-up and make it last all day (or night!). But I really hated spraying it on my face. It just felt wrong, and eventually I stopped using it because I didn't like the process. . Then one day when I was using my beauty blender to add a bit of liquid highlighter, I wonder if I couldn't use the sponge to also apply the setting spray. Turns out, I love this way of applying setting spray much more, for several reasons! One, you get a much more even coverage of the setting spray since you control exactly where it goes. Two, you don't have to spray anything on to your face. Three, it doesn't get in your hair. Four, since your pressing the setting spray into your make-up, your make-up not only lasts longer, but it also looks more natural!

how to: spray 2-3 spritzes of your fave setting spray (this is the one I use) onto a beauty blender, and pat pat pat!

use a dark eyeshadow + eyeliner brush to blend out liquid eyeliner
use eyeshadow over liquid eyeliner
up close pictures of eyelashes are weird.
Liquid eyeliner is my go-to eyeliner, and has been for the better part of the last decade. I love that you can be really precise with it, you can easily get in between the lashes (important for blondies like me!), and it lasts all day (seriously). My favorite holy grail eyeliner is Stila's - I keep a stock pile now just because I love it that much. One of my favorite tricks for emphasizing the eyes is to "smudge" the eyeliner out with a dark eyeshadow. I like to keep my eye make-up pretty "minimal" during the day (minimal for someone who likes to play with makeup!) by just wearing a swipe of eyeshadow, eyeliner, and mascara, but for occasions like going out with friends, on a date, or to special events, I use this to add a bit of dimension to my eyes without going overboard with a bunch of smoky eyeshadows and more liner.

how to: dip an eyeliner brush into a dark eyeshadow (mine is a dark purple from this palette), then starting right past the outside of your eyeliner, brush it towards the middle, right over the liquid eyeliner. Finish with your favorite mascara (my go-to combo is Urban Decay's primer + Bobbi Brown's mascara).

apply dry shampoo before working out instead of after
sports bra | water bottle
I only wash my hair about every four days...but I also work out about 4-5 days a week. My secret to not washing my hair after every work out is to use dry shampoo before rather than after. I find this provides some cushion to get your styling to last longer - the sweat doesn't get in your hair as much, and it's less likely to get frizzy from the humidity. I also always wear a shower cap when I take a shower afterwards!

how to: spray a generous amount of your favorite dry shampoo (this is mine!) before going to the gym. Use a soft hairband to keep your hair back during your work out, take your hair down soon after finishing, and wear a shower cap while in the shower. 

use texturizing spray before curling your hair to help set curls
I have fine hair - I have a lot of it, but it's fine, which means it does not hold a curl very well. Multiple hair stylists have tried to prove me wrong over the years, and every single one has commented how "oh yeah, your hair DOESN'T really hold a curl, huh?". Yep. I have found a few things that have helped though with my eternal desire for hair with more curls and volume. The biggest thing I've found that makes a difference is using a texturizing spray before I curl my hair. I have two I really like - Oribe was my original favorite (it smells so so good...but is also pricy) and Living Proof's volume blast is a close second. I find that my hair curls quicker (less time on the iron!), the curls last longer, and bonus, you already used the volumizing spray so you don't have to disrupt your curls after.

how to: spray on hair, focusing on roots and ends, wait a few seconds to dry, and then curl your hair how you usually do.


And that's it! My little beauty secrets that I've learned over the years. I would love to hear what your own little secret is - I'm always looking for new tricks to try!


Monday, March 20, 2017

stocking up on all your favorites for 15% off

Nordstrom currently has a ton of beauty items for 15% off, including products from expensive brands like Dior, Bobbi Brown, Laura Mercier, Estee Lauder, and Urban Decay, just to name a few! You can find all the items here, but I've picked out a few for you guys! The first list includes all my tried and true favorites - products I use every single day, have purchased again and again, and that I'm stocking up on now. The second list includes all my wishlist items!

  1. Bobbi Brown eyeshadow pencil: I own this in both bark and dusty mauve. I use it by smudging it on my waterline, and then using my pinky finger to blend it. I have found it to be the perfect way to create a simple smoky eye on the lower lash line without dealing with a bunch of different liners and eyeshadows and pencils. 
  2. BareMinerals BB cream: This is one of my favorite products, and if you are someone with dry skin who is looking for a bit of coverage but nothing heavy, this is a really great option. Plus you don't need a ton, so it lasts forever. 
  3. Bobbi Brown blush: I own this in several colors, but my favorite and every day color is pretty pink. It's just that classic pink blush that you can easily build up to be brighter, but is soft and pretty and just goes with everything. 
  4. Stila eyeliner: *holy grail item* This is the only eyeliner I have purchased for the past seven years. I must have purchased at least 25 of these over the years, and am purchasing two now just because of the sale. It goes on smoothly, it really lasts all day (no flaking or smearing), and it's just overall a holy grail item for me. 
  5. Beauty Blender: Possibly the most versatile item I own - I use this to blend out my foundation and concealer, tap on setting powder, and use it with my setting spray to set my makeup. There's a larger set I'm probably going to purchase as it comes with a few smaller sponges and the cleanser!
  6. Urban Decay setting spray: I didn't really believe in setting sprays until last summer when I used one before a wedding, and was surprised when my make-up lasted all night. My favorite way of applying it is by spraying it on my beauty blender and then patting it on my face - I feel weird spraying it straight on my face, and feel the patting method works better. 
  7. Urban Decay eyelash primer: One of my big make-up "tricks" to build up longer and thicker lashes. Lashes are my favorite thing about make-up, and a primer creates the perfect base for that almost falsies look I love. It also prevents your mascara from flaking (something I know a lot of people have issues with when it comes to the Better Than Sex mascara, but something I never experienced because I used a primer). 
  8. Bobbi Brown mascara: I've been using this for about six months and really really like it. I used to be a BTS fan, but like the Bobbi Brown mascara even more (see my comparison here). 
  9. Essie's gel nailpolish: Y'all know that I'm a big fan of this line of nail polishes - you can see my review here. I wear the Fairy Tailor and Pre-Show Jitters almost exclusively. I'm just hoping they come out with a few new colors soon! 
  10. Smashbox powder: *holy grail item* This is another of those items I've purchased and repurchased for at least seven years now. For those of you with dry skin, this is the only powder I've found that doesn't leave a cakey flakey mess on top of dry skin. On lazier days, I only use a bit of concealer on blemishes and this powder, and it evens out my skin and lasts all day. I just love it. 
  11. Dior lip balm: I just talked about this lip balm last week! I like this because it smells nice, it's soothing, and it adds just a bit of color to your lips without being too much. I own this in the sheer pink color. 
  12. Anastasia eyebrow pencil: I've tried several different eyebrow products over the years - I used to use the duo powder, then for a while I used the thinner Brow Wiz, and now I've really settled on the Eyebrow definer because the thicker pencil means it looks less harsh, it goes on quicker, and it lasts the longest. I wear this in taupe. 
  13. Smashbox primer: I have pretty large pores on my nose, and as my dermatologist tells me, there is nothing you can do about it (and even with that advice, I still try product after product...just in case). So since I can't fix that problem, I use this primer to cover it. It blurs the pores, and makes your skin so smooth, so foundation goes on even smoother. I really love it, and am repurchasing another tube now. 
  14. Urban Decay concealer: I've repurchased this concealer twice now. I know it's a YouTube favorite, and for good reason. It goes on smoothly, blends perfectly, and doesn't crease. I wear this in light neutral!
  15. T3 curling iron: I've owned this iron for about nine months now, and it remains the best curling iron I've ever used. I really believe that because of this iron, my hair is much healthier than it was previously, just because I have to curl my hair less often and for less time. It's pretty pricy, so the 15% off makes a big difference!

And now for a few things on my wishlist. Some are items I've had my eye on forever (like that Dior balm I'm finally going to try and the Mac eyeshadow I tried out a few weeks ago in store), others that beauty bloggers and youtbers rave about (do I need an eyebrow gel? ...maybe.) and others that just caught my eye (hello, fun new face scrubs!). 
  1. Dior foundation
  2. Dior balm
  3. Philosophy microdermabrasion kit
  4. Anastasia highlighting kit
  5. Mac eyeshadows
  6. Clinique cleansing balm (has anyone tried this? people seem to love it!)
  7. Anastasia brow gel
  8. Dior lip gloss (I want to try 'kiss me'!)
  9. Origins face scrub
  10. Clarins eye gel
  11. Bobbi Brown moisturizing mask


Tuesday, March 7, 2017

my all time favorite lip products

I love love love lip products - balms, lip sticks, glosses, treatments, masks. I am never not within several feet of several different types of lip products - some I even keep on me at all times! For someone who wouldn't wear lipstick a few years ago, I'm definitely embracing adding a bit more color to my lips. While I still stick in the safe zone of the pink family of color, I've tried a ton of different products over the years. There are several things I'm still hesitant to try (looking at you, liquid lipstick) and others I'm currently trying out (I just got my first order of Lipsense products) but the following are my ride or die products that I've replaced countless times.

LIPBALMS

Living in the Midwest with our extreme seasons, and working in hospitals with dry air, means my lips are dry quite often. I've tried tons (TONS) of lip balms over the years, from the cheapest stuff to the most expensive (although I've heard nothing but good things about Dior's rose lip balm, so maybe I will have to try that too...). I always have Blistex's Lip Medex in my car - it is the only drug store chapstick I've found that actually soothes your lips and doesn't leave a waxy film. I'm obsessed with it, and have probably purchased this over ten times. In my purse, I always keep Clinique's Superbalm. It goes on so smoothly, and feels really refreshing. When I'm at work, I always keep Kaplan MD's lipbalm in the little arm pocket of my Patagonia. The packaging is small, so I don't even notice it in the little pocket, and you only need a tiny amount to moisturize your lips - as you can see by the fading of the print, I use this all the time. It comes in a kit with a lip mask, and both have made a huge difference in how my lips feel. Lastly, I use Glossier's balm dotcom at night after brushing my teeth and washing my face. Even with a humidifier in our room, my lips get really dry because my retainers (#sexy) make me sometimes sleep with my mouth open. This stuff really lasts, and it's like a little treat putting it on at night. Plus the packaging is just so pretty - Glossier seems to do no wrong!

SUBTLE COLOR

On days I'm not wearing a lot of makeup, I don't really like to wear lipstick either - it's all or nothing for me! But I do like a bit of color, so I got to these two sheer lipbalm-ish products. The first is Dior's Lip Glow - this supposedly works with your own pH to create a custom color. No idea how true that is - I just think it smells nice and adds a bit of brightness to my face. I also really like Covergirl's Oh Sugar! in Candy - this is EXACTLY like Fresh's lipbalm (same color, same flavor, same everything) but for like a fifth of the price. It smells soooooo good. 

LIPSTICKS

As you can see, I don't really venture too much outside of the soft pink, "your lips but better" colors. The brightest of the bunch is Nar's Roman Holiday - this is my third tube, and I'm basically in need of ordering my fourth as that little nub you see is all that's left. This is a soft hot pink, if that makes sense - it's bright and fun without being super over powering and in your face. The next two colors are pretty similar. Lancome's Love It! is a little more subdued, while Bare Mineral's Tutu has a bit more punch to it. Last is my favorite lip product - it's YSL's Oil-in-stick in Nude Lavalliere - this is the epitome of the "your lips but better" color combined with a product that hydrates your lips (since it's 65% oil). It's such a pretty color in such a hydrating formula - definitely the priciest of all the products, which is why it continues to be a "special occasion" lip product, but one I can't help but love.

LIPGLOSSES
bare minerals // urban decay // clinique

I used to be a lipgloss queen - since I was a bit afraid of the heavy color that lipsticks have, I used them to add color. Now that I'm more comfortable with lipsticks, I only keep a couple of lip glosses around. My favorites are from Bare Minerals (that I'm just now realizing is discontinued! WTF), Urban Decay's Naked in Lovechild, and a Clinique gloss that was a free with purchase item that I feel in love with (in the color First Date). As you can see, they are all pretty similar in color, which is why  kind of just interchange them all!

And that's it! Nothing super crazy - I always play it a bit more safe with lip color. Like I said, I'd really like to find a liquid lipstick, but I haven't found one yet where I love the color and formula. I hope you guys have some suggestions!

ps. I posted on instagram stories yesterday about the make-up storage I use, and had so many people ask about it that I just wanted to discuss it quickly. I bought acrylic make-up organizers on Amazon, and it has made the world of difference when it comes to organzing make-up. I finally go see where everything is! Mine is two parts - the top part is this set, and I just added these drawers


Tuesday, February 21, 2017

how to: do an at-home manicure

There are some things I pay the professionals for - threading, waxings, and coloring my hair are definitely left to people who know better than I do. I am more than willing to pay someone else to work their magic on my hair every few months. But I have never been one of those girls who gets a manicure every other week. I find the process of going to nail salon tedious, especially if you have to do it every 14 days! But because I love my nails to be painted, I have my own methods of giving myself an at home manicure. It saves me so much time and money in the long run, and I even like the results from doing it myself more than when I do get my nails done professionally! Here's my step by step guide of how I do my nails.

Here's what we're starting with. I think this is about 2.5 weeks old. If it wasn't for the fact that I was doing a lot of work around the house, I think the nail polish would have held up even longer.

Tuesday, February 7, 2017

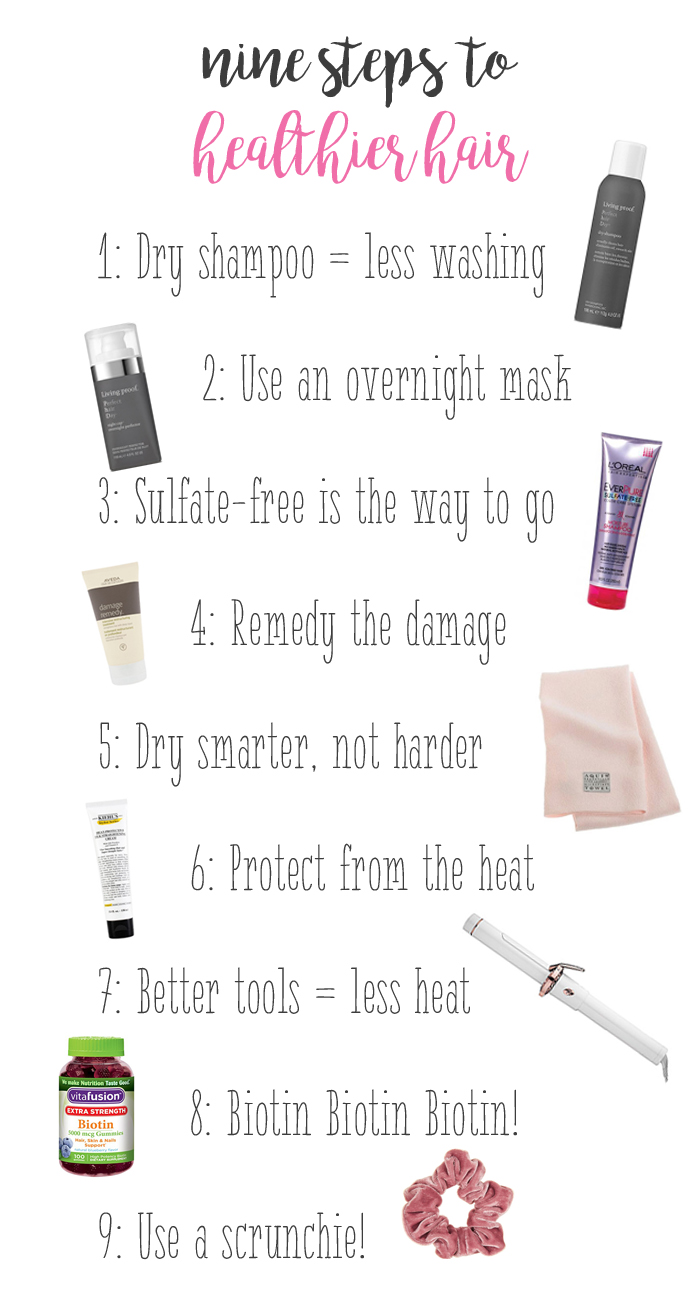
beauty tuesday: nine steps towards healthier hair

tips for healthier hair

About 18 months ago, my hair got accidentally chopped off. I went in for a trim, and for some reason, I left the salon with about seven fewer inches than I walked in with. I...cried. I really was upset! I feel like I am always growing out my hair, and I was almost at the length I wanted...and then some guy cut it all off. Since then, I've been back in the growing out phase, but I went into it trying to grow out healthy hair. Looking through pictures, my hair is now about the same length but it looks and feels so much healthier than it did then! Here's what I've done differently in that time:
  1. Washed my hair less: This has probably made the biggest difference over the past couple of years. A few years ago, I was still washing my hair every other day, if not every day! Horrible -between the shampoo, toweling, and all those hot tools, that puts so much strain on your hair! It definitely takes a bit of time to get your hair used to going from frequent washings to less frequent, but it's so worth it in the end. I now save all that time I used to spend drying and styling my hair, and my hair is in much better shape! I've used a ton of different dry shampoos over the years - my current favorites are the Living Proof dry shampoo (duh, you guys already knew that) and the Aveda Shampure
  2. Treat while you sleep: The Living Proof Overnight Cap is kind of a genius idea, if you think about it. I personally don't love putting on a hair mask in shower all the time because you have to stand around forever for it to work. This is great because you put it on at night before going to bed, and it does the work overnight while you sleep! I slap it on (focusing on the ends), put my hair into a loose bun, and go to sleep. In the morning you just rinse it out! I use this about once every other week (I typically wash my hair at night after a work out)
  3. Use less sulfates: A couple of years ago, I made the switch to using L'oreal's sulfate-free shampoo. I had tried a couple of different sulfate-free shampoos, but most of them didn't give you that good lather (I just like feeling like my hair is getting cleaned!), but L'oreal's does, which is why it's one of my favorites. Since sulfates dry out your hair, and strip your hair of color if it's dyed like mine is, not using sulfates in shampoo makes a big difference! If you are willing to spend a bit more money, Aveda also has a great damage remedy shampoo that gives you a good lather (and smells great!). 
  4. Deep condition: I have been using this intensive restructuring treatment from Aveda for about six years now. I first started using it when I got a perm in college (yikes...not cute on me!), and recently re-committed myself to using it. It's fairly pricy, so I use my normal conditioner on the rest of my hair, and use the treatment on my problem areas (my wispies and my ends). Typically I use this when I'm shaving my legs, since I'm standing around in the shower anyway!
  5. Use a hair towel: I don't remember where I first learned about hair towels, but they are definitely a game changer for me! I like my hair to mostly dry before I use a hair dryer, but when using a regular towel and partially air drying, my hair just got really frizzy. Using a hair towel has made my hair dry more evenly and quicker than it was before, plus it's a lot thinner than a normal towel, so it's less of a pain to carry around on your head! The one I'm currently using is from Aquis (I got it on Amazon), but I also just received this one in my PopSugar Must Have box that I'm going to try out next (ps. if you want to save $5, use code SHOP5 for your first box!)
  6. Protect from the heat: I've tried a bunch of different heat protectors over the years, but I keep sticking with Kiehl's smoothing cream. I love that it is a styling cream and a heat protector, and doesn't leave my hair crunchy like heat protecting sprays I've used in the past. 
  7. Better tools = less overall heat: I used inexpensive curling irons for most of my life - I figured, they all heat up and curl your hair, what's the difference. Then I got my hands on a T3 iron, and wow...I'm a believer now. The curling iron is expensive, for sure. But because it holds its heat so well, my hair curls quicker (less time on the iron) and the curls last longer (less re-curling). I used one of my old irons a few days ago, and couldn't believe the difference. Eventually I'd love to also own a nicer hair dryer, but we'll have to keep saving for that one for a little bit!
  8. Biotin Biotin Biotin: When I got home from that hair chop, I immediately went online and ordered a huge bottle of biotin. For some people, biotin makes hair and nails grower quicker and thicker, and for some people it doesn't do anything at all. I'm somewhere in the middle - my hair and nails definitely grow at a quicker pace when I'm taking the biotin (which is almost annoying because I don't like when my nails grow quickly). I get the gummies because I don't like taking pills, and it's like a little treat every time you get to take them! Some people have noted that they have issues with acne when they start taking biotin, so if you haven't taken it before, just be warned. 
  9. Use gentler methods of pulling your hair back: Nothing pulls your hair out of your hair quicker than a rubber band. I still use a regular hair tie when I work out, but other than that, I stick with clips and scrunchies (a scrunchie?!). I love the little clips during the day, big alligator clips at home and when styling my hair, and a scrunchie or invisibobble at night or in the shower. They are all a lot more gentle on your hair than a regular hair tie, and that makes a big difference in the long run if you use a hair tie every day. 
And for a bit of proof, here's a bit of a hair timeline. The left picture is a few weeks before my hair cut, the middle picture is the week after, and the right picture is from a few months ago!


Tuesday, January 17, 2017

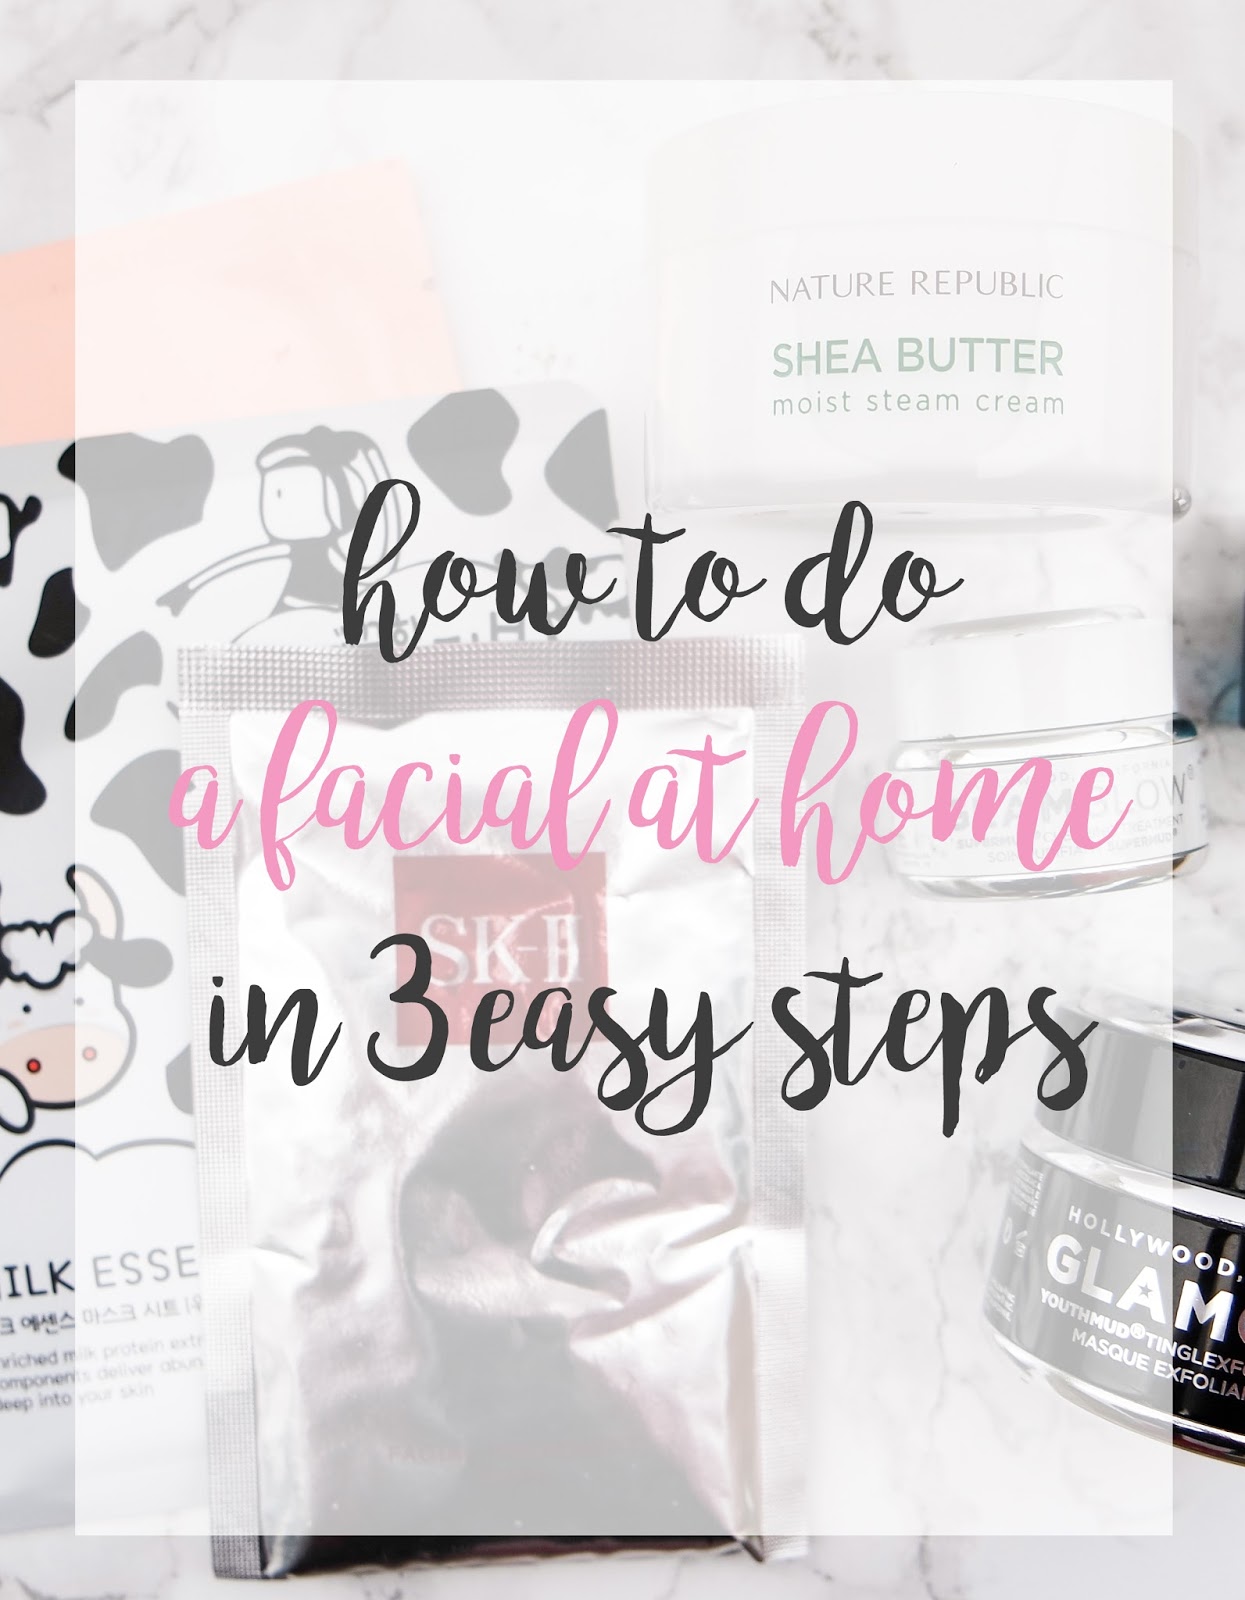
how to: do an at home facial in three easy steps

how to do a facial at home

Years and years ago during my freshman year of college, I took a sociology class. In it, we learned that the only trait that is seen as attractive across all countries and cultures is good skin - teeth, hair, body type, and make-up all vary, but everyone considers good skin beautiful. This has obviously stuck with me, and for the last few years, I definitely have been trying to get ahead of the game - we're not getting any younger here! I wash my make-up off every night, I use sunscreen, I use my retin-A at night, I do masks fairly regularly, I try to drink plenty of water, and so on. For a while, I was getting a facial every couple of months, and while my skin felt awesome for a day or two, I have over the past year or so not gotten one in an effort to put my money towards other skin procedures (more about my microneedling experience in a few weeks!). So instead, I have figured out how to do my own facials at home that still give me smooth and glowing skin for a few days without dropping $75 every six weeks on the same results. I do these about once a week (usually during The Bachelor!) and feel that it has made quite the difference in how my skin is the rest of the week!

how to exfoliate your skin
EXFOLIATE: Pretty vital to the process of getting smooth and glowing skin is getting rid of that top dull layer! My go-to process is after washing my make-up off in the shower, I'll do a quick pass with my go-to face cleanser and a cleansing sponge - basically just to remove the last of any make-up, and to get any big flakes. Plus taking a shower before all of this helps open up your pores. After getting out of the shower, I put on a layer of Glamglow's clearing treatment on any blemishes (this jar came in a holiday set last year), and the original mask over the rest of my face. I also put on a layer of KaplanMD's Perfect Pout lip mask. I wait about 15 minutes or so, just until the mask is dry. Because this mask can be drying, I don't like to keep it on my skin much longer than that. I then using a wash cloth, and gently scrub the mask off. 


TREAT: I have loved exploring all the different types of sheet masks out there - they are the perfect product for these at home facials! Once you exfoliate, this is the time you want to address whatever issues you're having with your skin, whether it's dry skin (me during the winter!), acne (especially around that time of the month), dullness (again me during the winter), or oily skin. I first started using the Sephora masks about a year ago, but several of you had mentioned getting cheaper ones from Memebox, so I ordered a whole bunch a few months ago that I'm still working through. Most of those masks cost between $1 to $3, so if one isn't great, it's not a huge loss! So far, I think my favorite mask from them has been the E.G.T. Timetox mask (no longer available on Memebox, but it is on Amazon) and the Tosowoong Pure Propolis Mask. I still have a whole stack to go through though, so I'm sure I'll fall in love with others. I've also tried the Tony Moly pack found on Amazon, which I quite liked (plus it's super cheap and you get a bunch of mask that treat different issues). I still occasionally will buy the more expensive masks, like the Dr. Jart+ mask I tried last night, and the SK-II mask that I'm saving for a special occasion because it's so pricy, but have found there really isn't much of a difference between the more inexpensive versions and the expensive versions, especially because the results you see from either mask aren't going to last forever - it's all somewhat temporary. So once you have exfoliated and dried your face, you just slap one of these on your face and wait 20-30 minutes. I also will put in my teeth whitening trays during this time - you can't really move your face much while wearing the masks, so it's really killing two birds with one stone! After the time is up, you remove the mask, and the rub the rest of the serum into your skin.

MOISTURIZE & SEAL: This part will really vary depending on your skin type. I have quite dry skin, so I like to use a heavier moisturizer, especially after using a product that can dry out your skin like the Glamglow mask. Recently I've been using Nature Republic's steam cream - it's pretty heavy duty, so it's the perfect last step for me (but definitely not something I would use as a daily morning cream). I would say it's a medium weight cream - it's not like a Nivea cream that is heavy but it's also not your light weight moisturizer that goes on super sheer. Like I said, this last step again depends on what you are looking for for your skin.

And that's it! Super easy, super efficient, and gets the job done! My skin always feels so soft after I do this, and while I would love the relaxing atmosphere of a spa while someone rubs creams all over my face, I feel I've gotten similar results sitting at home on my couch watching tv.
And although I've documented this on Snapchat a dozen times, here's last night's facial in all its bare skin glory during The Bachelor (Corinne is crazy and insecure, correct? I have lots of thoughts). Now if only I could figure out an at-home remedy for my dark tear trough (which I've had since I was a kid, so I can't even blame school for them!).